Have you ever felt like a photograph was drawing you into its world? Have you ever wondered how some images can transport us to places we’ve never been and stir emotions we didn’t know existed? Welcome to the magic of photography. And where better to capture this enchantment than in one of America’s most beloved natural wonders – Yosemite National Park.
A place that changes with every blink; it’s here that I found myself lost within an expansive canvas painted by nature itself. But not all frames are created equal when trying to encapsulate Yosemite’s majesty into your lens.
Stick with me if you’re hunting for the top photo ops in Yosemite. We’ll traverse iconic valleys, roar past waterfalls, scale high-altitude views and tread rewarding hiking trails. Let’s discover those hidden gems often overlooked by others.
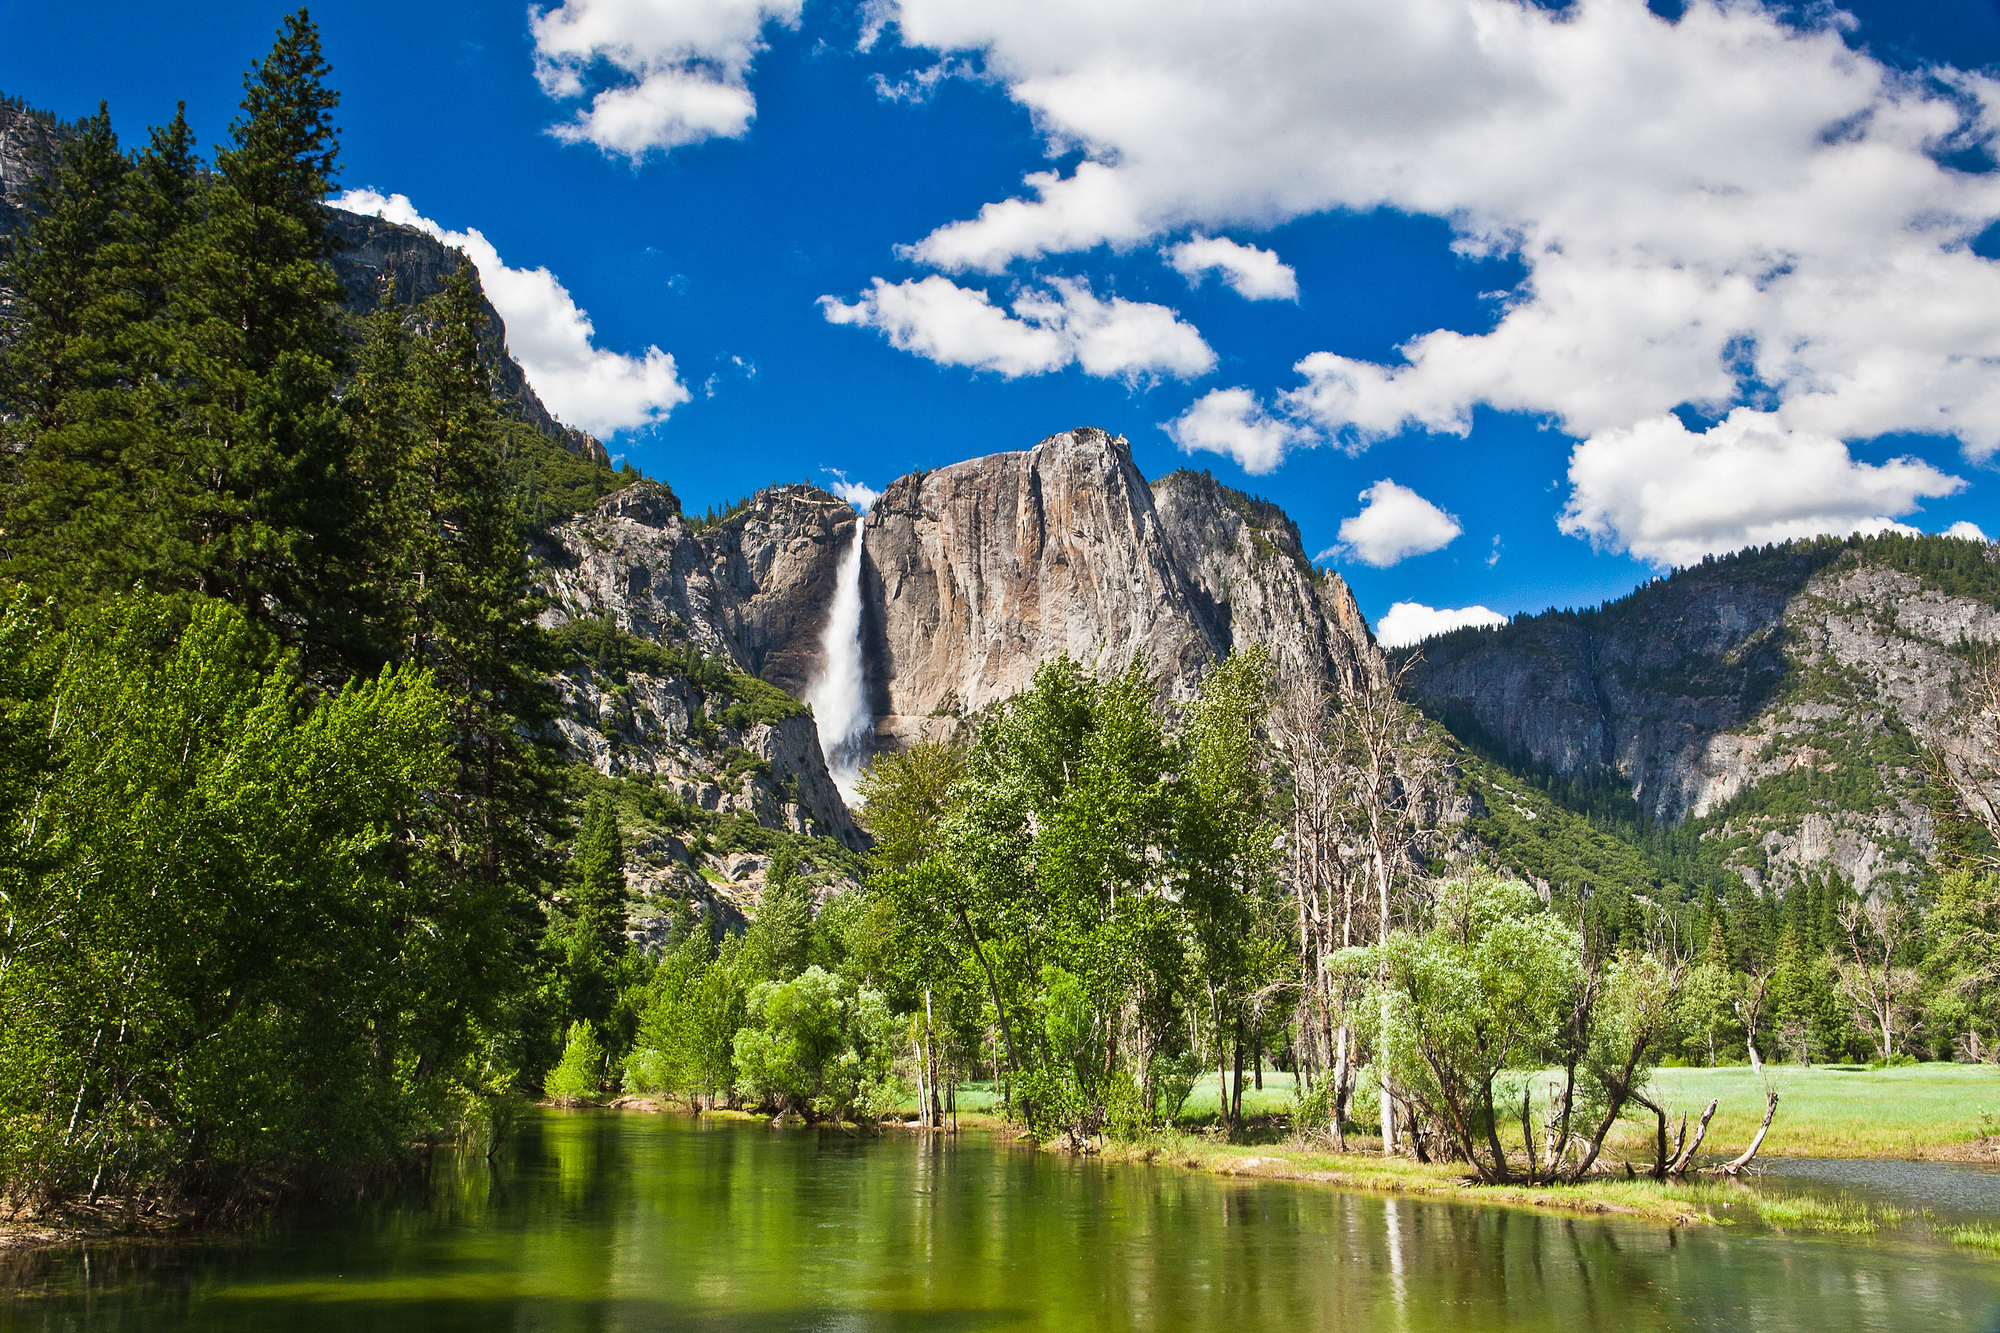
Iconic Yosemite Valley Photography Spots
With over 4 million visitors each year, Yosemite National Park, spanning nearly 1,200 square miles, is a photographer’s paradise. This guide gives detailed insights into its iconic photography spots.
Unveiling Tunnel View

Tunnel View stands out as the most popular viewpoint in Yosemite. Why? From Tunnel View, visitors can take in the sweeping valley floor with El Capitan and Bridal Veil Falls framing either side of the view and Half Dome at its center. Imagine capturing El Capitan and Bridal Veil Falls, framing either side of your shot with Half Dome at center stage.
This spot isn’t just about natural grandeur though – it also carries historical significance as part of the Wawona Road built back in 1933. As you set up for that magical shot, remember this view has captivated viewers for almost a century now.
El Capitan’s Majesty
If you’ve watched Free Solo or are an avid climber yourself, then El Capitan needs no introduction. But did you know from Cook’s Meadow Loop on Sentinel Beach Picnic Area provides one of the best views to photograph ‘El Cap’?
The majesty of this vertical rock formation soaring above Yosemite Valley makes it absolutely breathtaking during golden hour when soft light bathes its face – creating dynamic contrasts perfect for black-and-white shots too.
Whether you’re looking for landscapes, action shots of climbers, or simply the awe-inspiring beauty of nature itself – Yosemite has something to offer every photographer.
The Allure of Waterfalls in Yosemite
Yosemite National Park boasts a wide array of picturesque waterfalls, including the renowned Bridal Veil Falls. One such spectacle is the Bridal Veil Falls, a majestic waterfall that flows year-round, offering a feast for photographers.
Capturing Bridalveil Falls
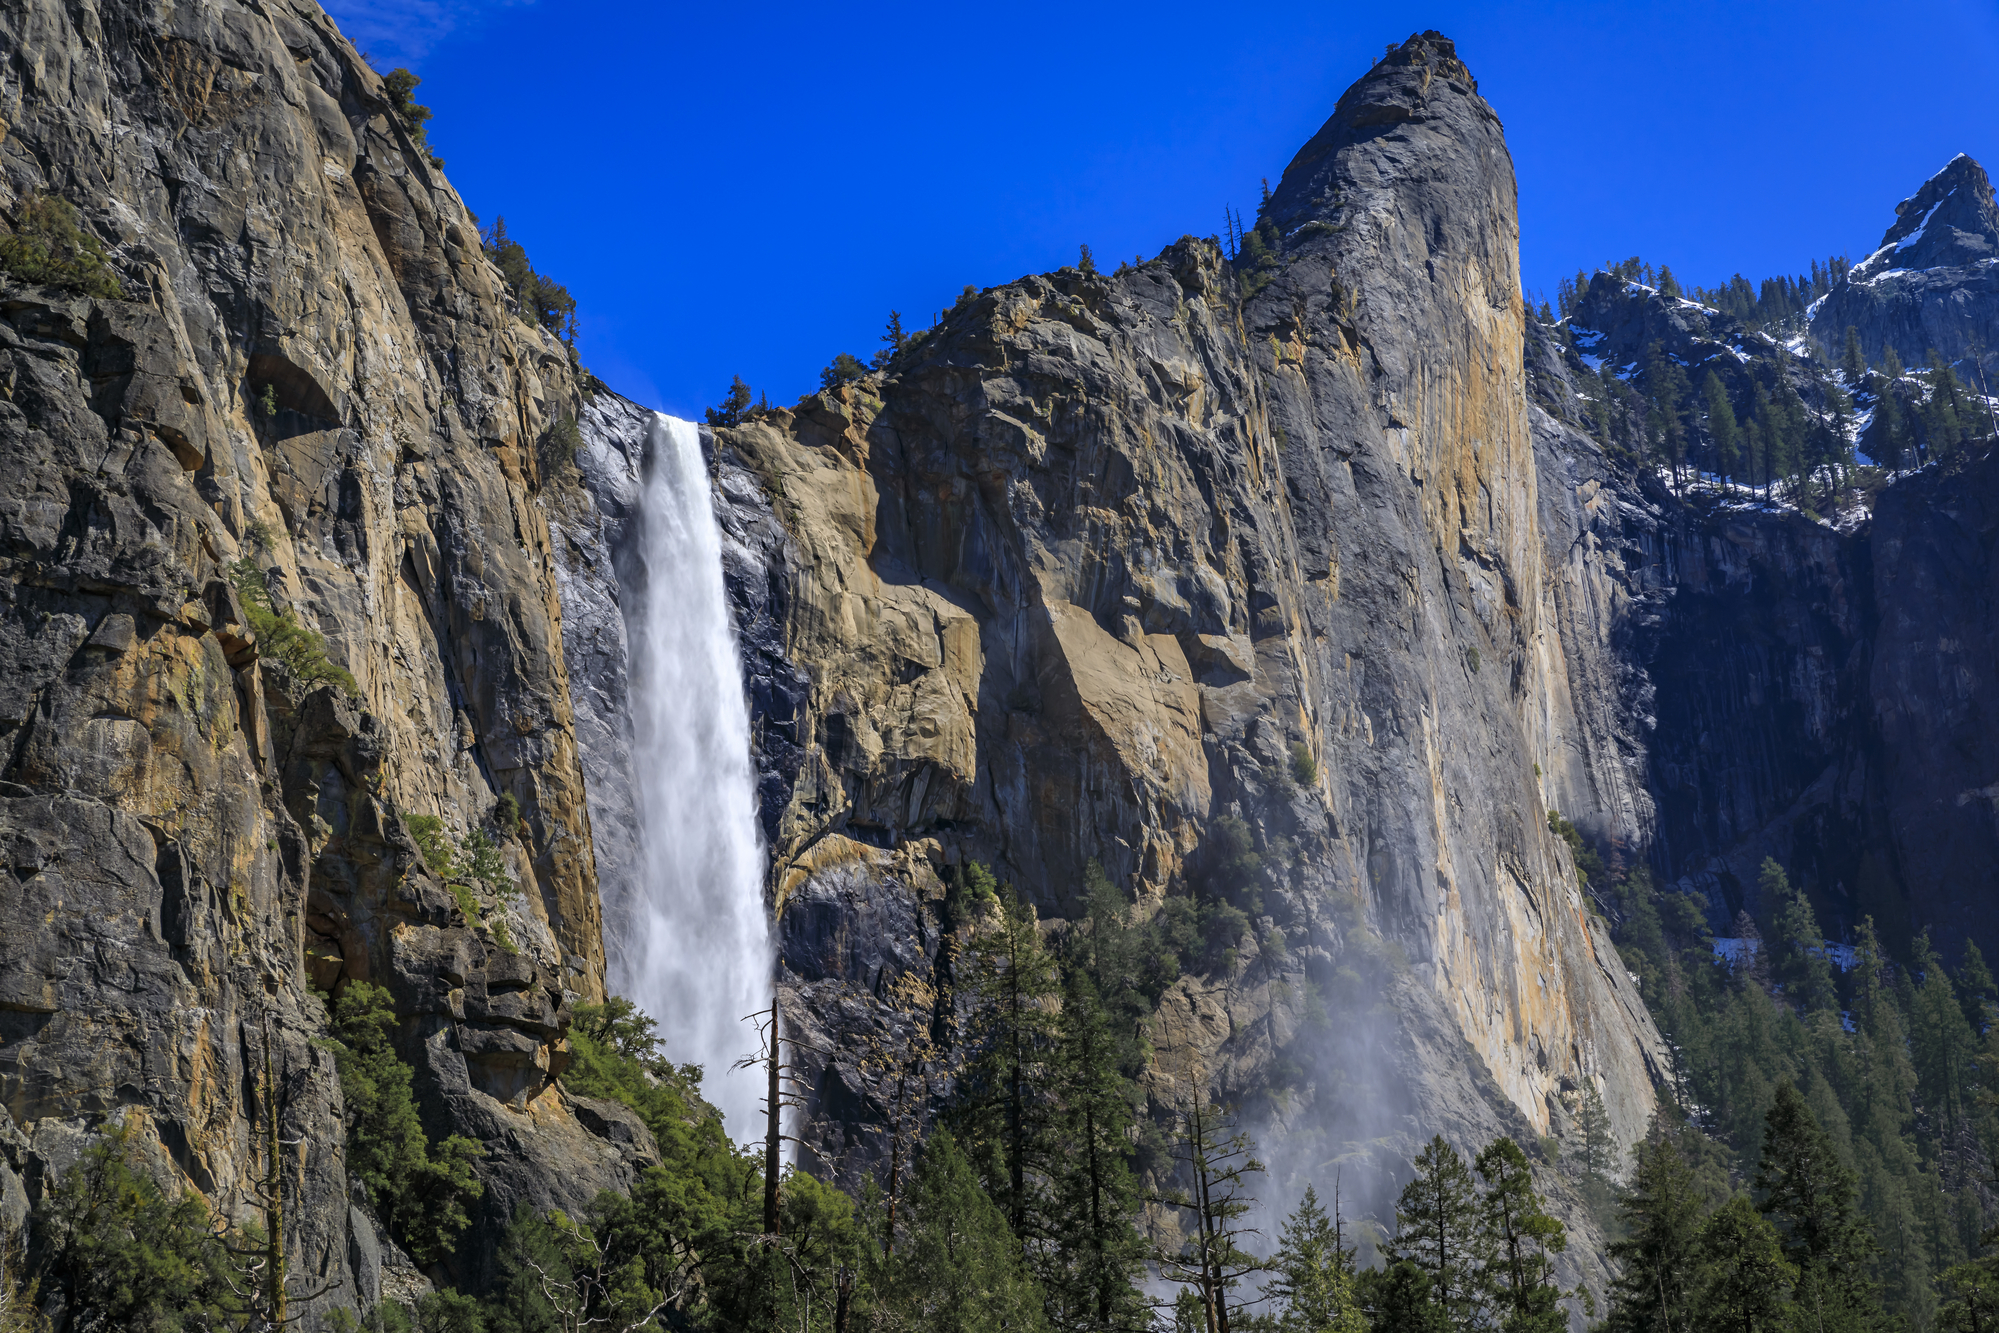
To capture the beauty of Bridalveil Falls, timing and equipment are key. Late spring or early morning offer soft light conditions ideal for capturing this waterfall’s magical time. Using a zoom lens can help get close-up shots from vantage points like Valley View parking lot without getting drenched by the mist.
This guide on choosing landscape photography lenses could be your assistant here.
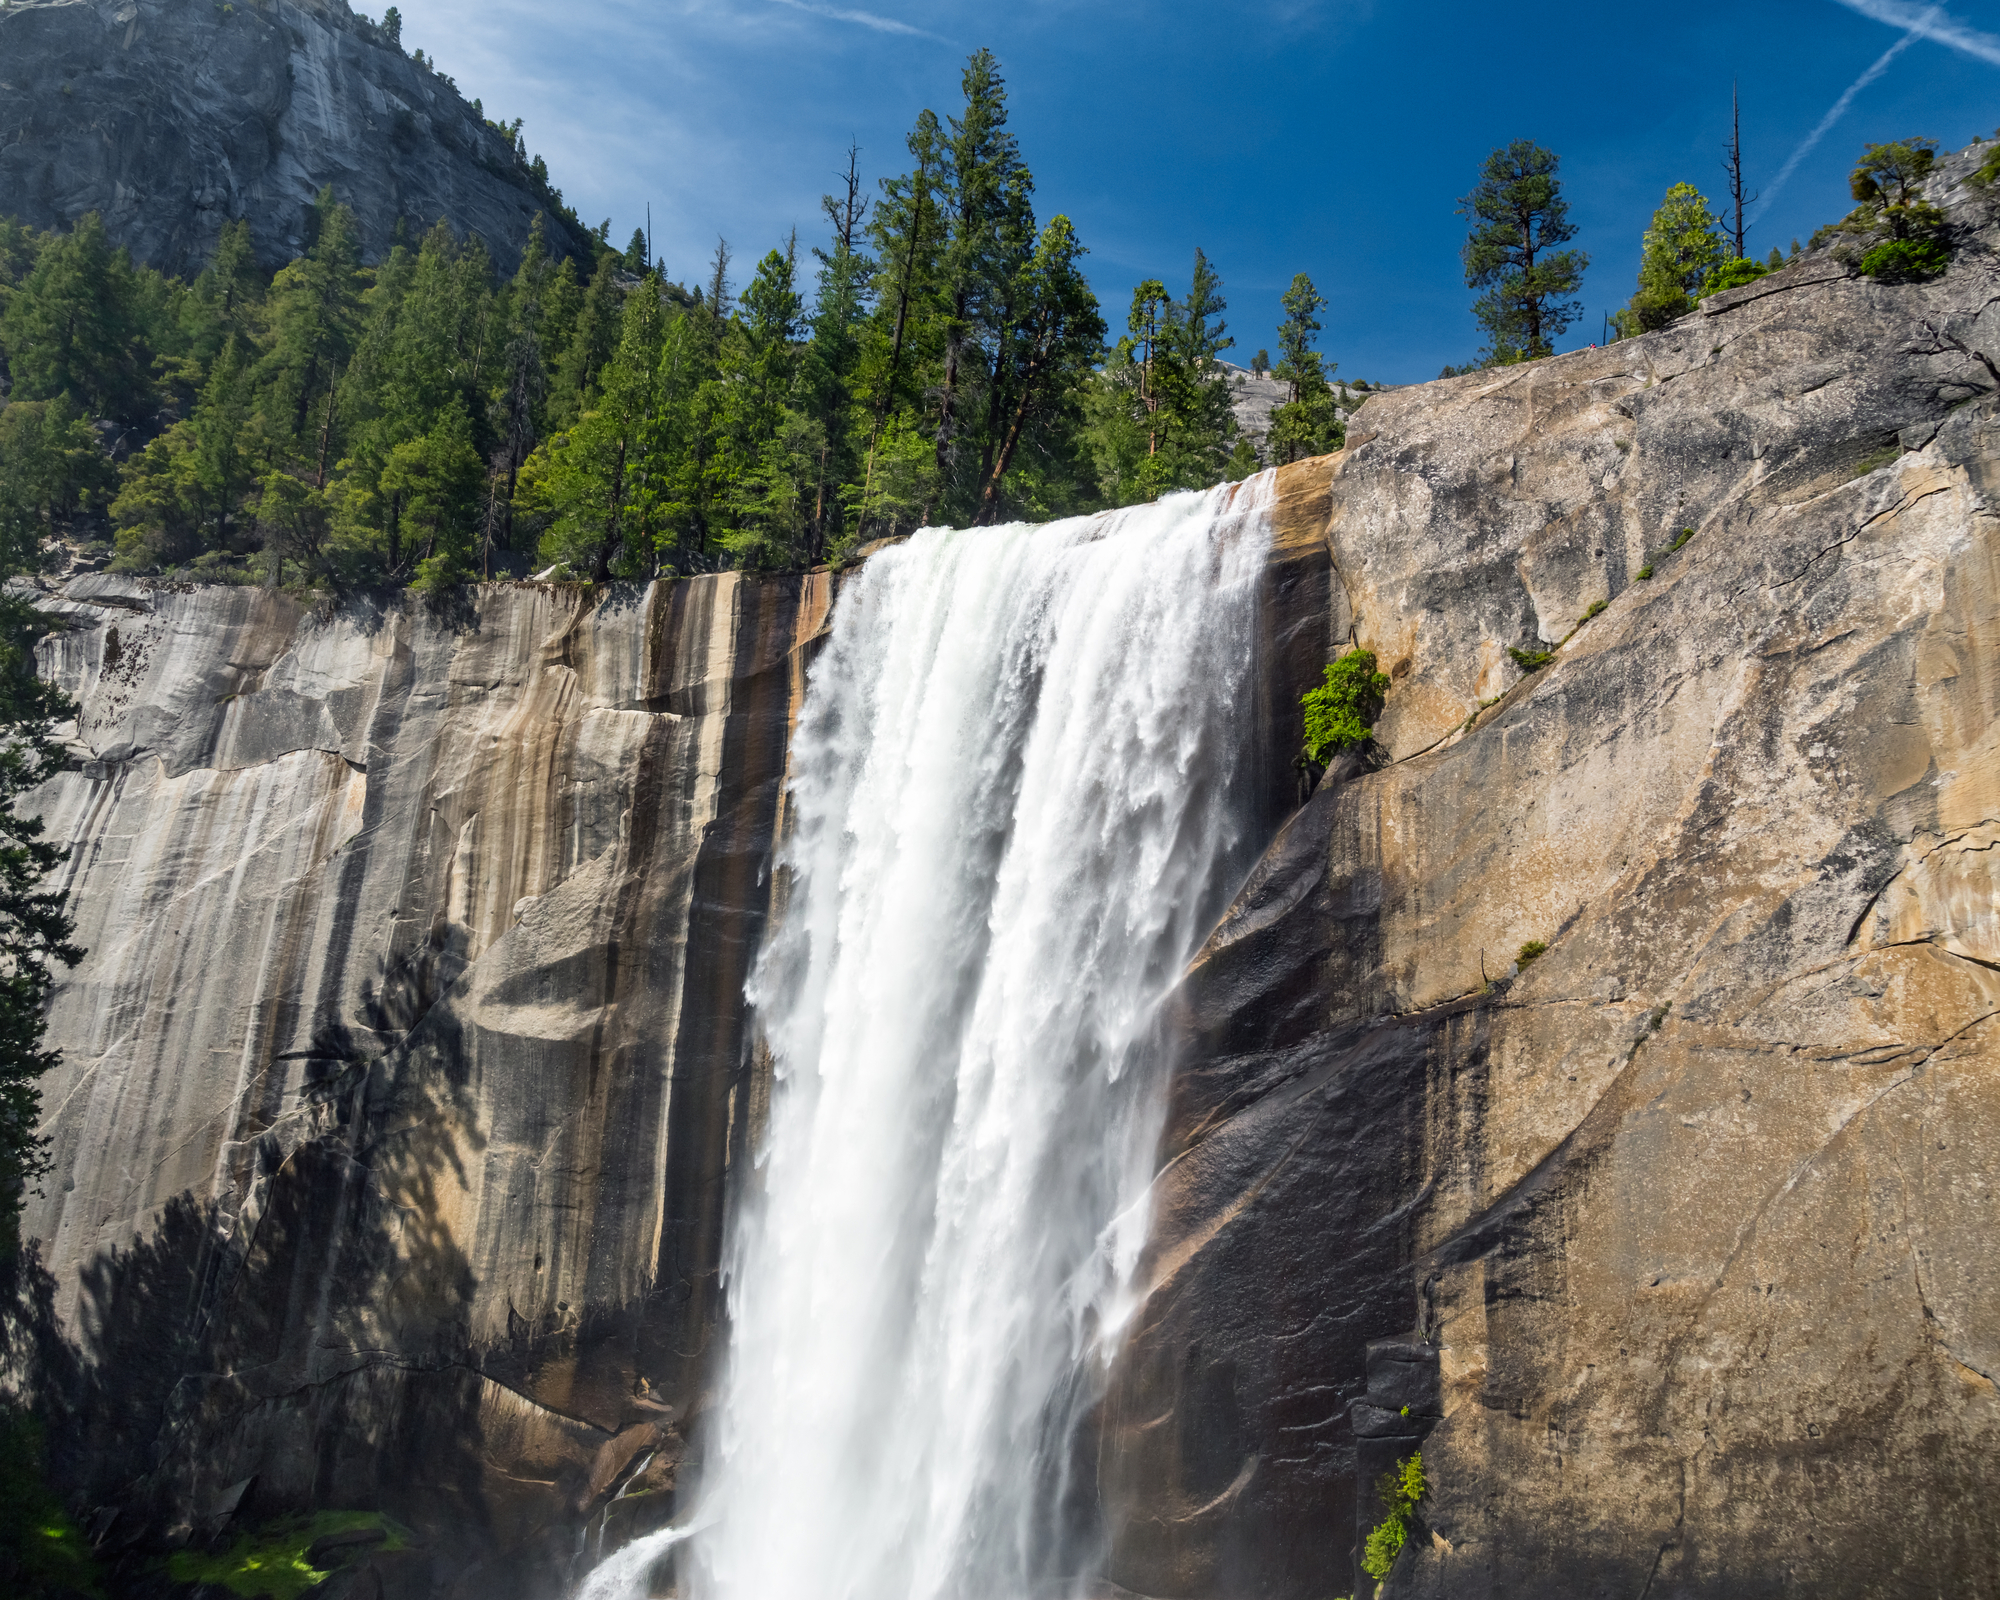
Apart from Bridalveil Falls, another gem within Yosemite’s treasure trove is Vernal Fall – one of the most famous waterfalls in Yosemite and an absolutely beautiful sight during late afternoon when it’s bathed in golden hour sunlight.
Lower Yosemite Fall
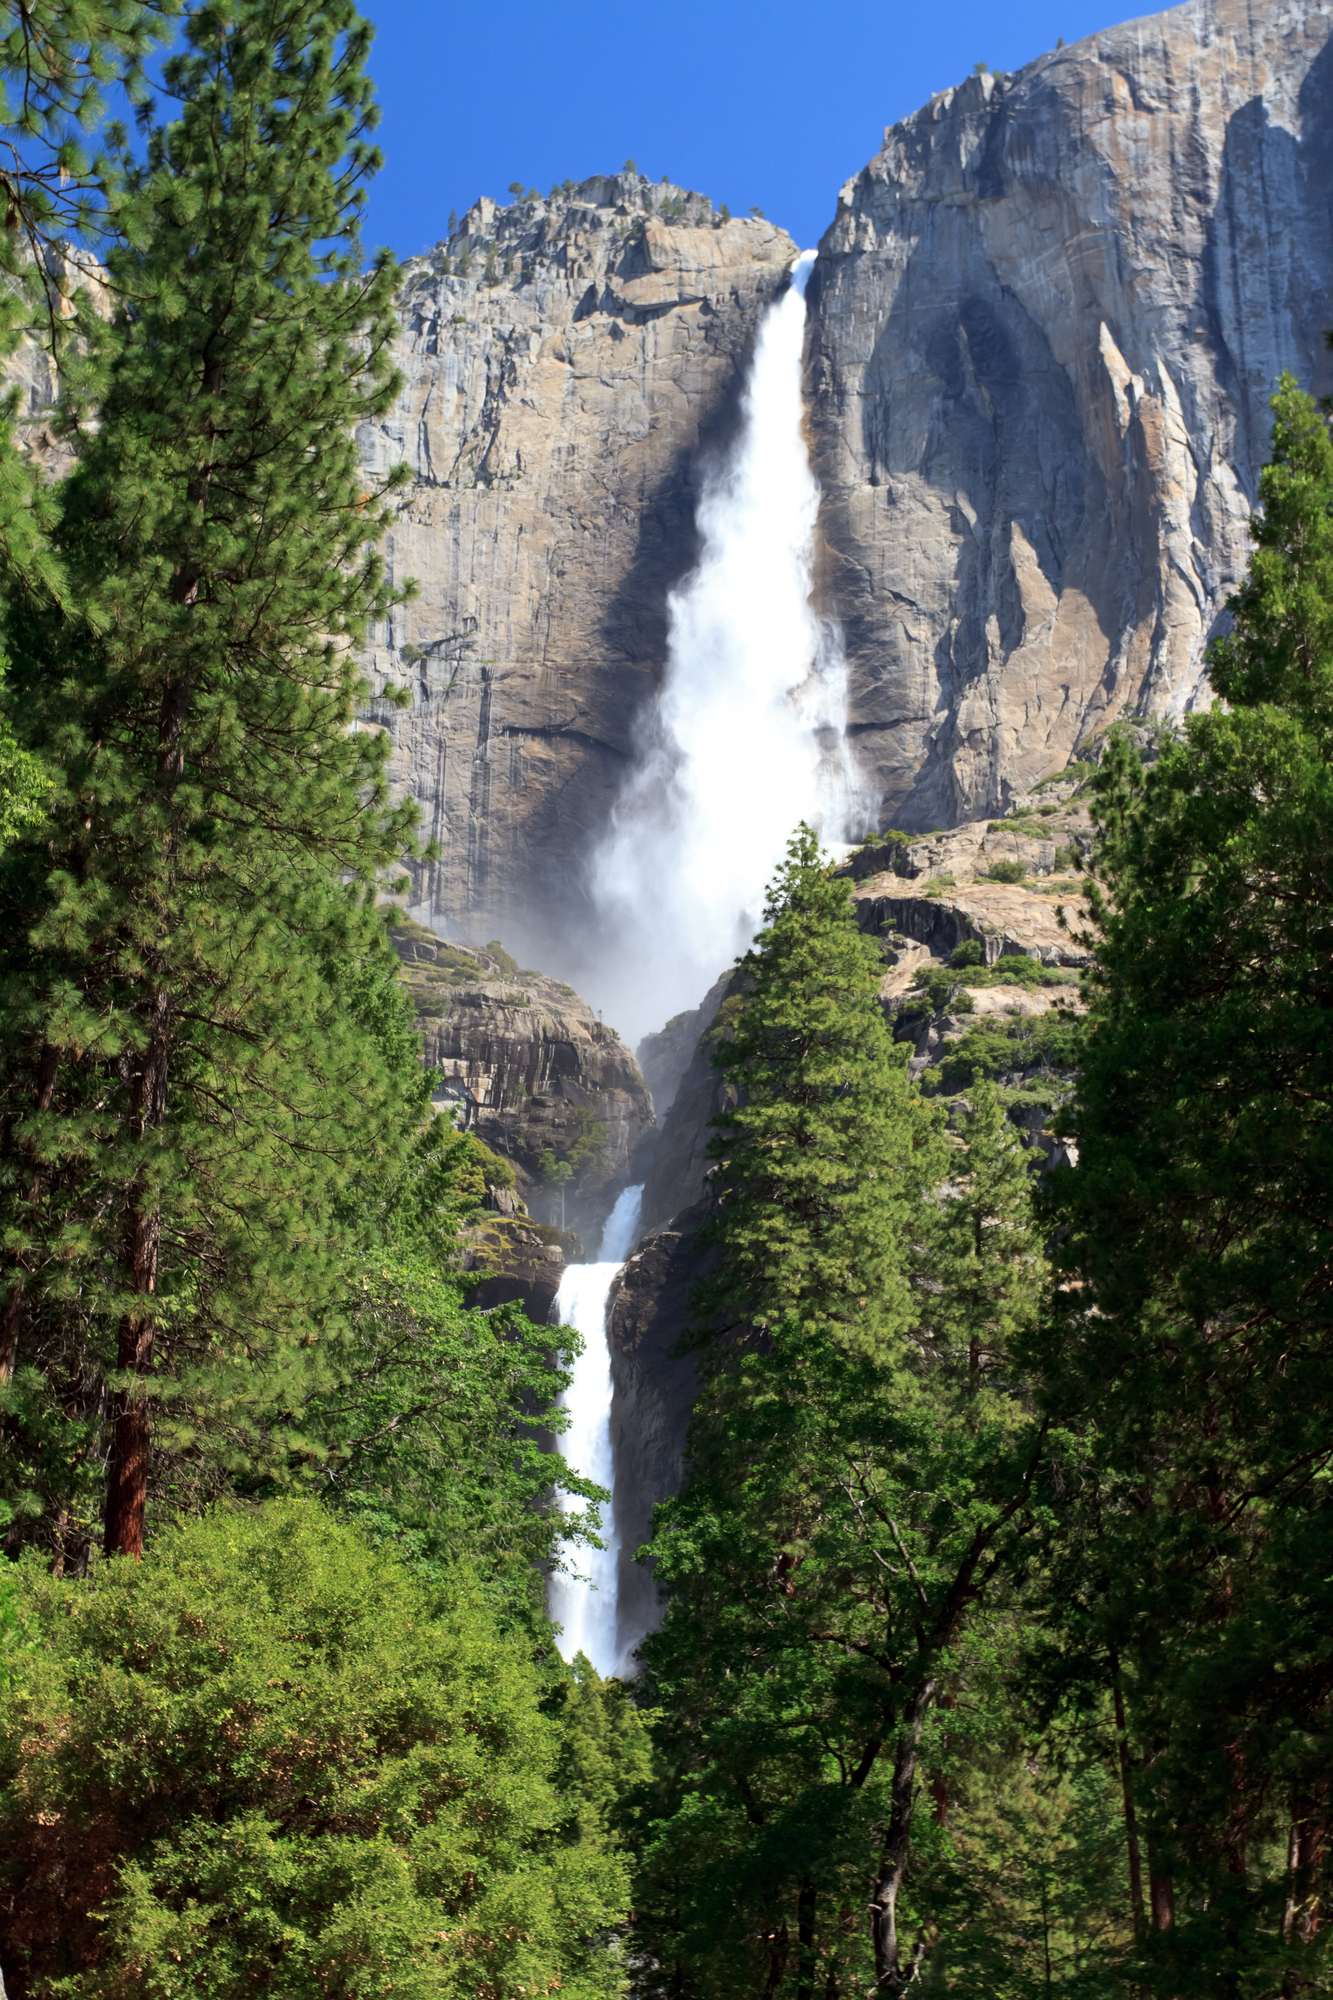
If you want to capture an iconic image of Yosemite falls, look no further than Lower Yosemite Fall. It’s accessible via an easy hike on the Valley Valley and offers great views even from its car park area at the Swinging Bridge picnic site.
Wait until just after sunrise or before sunset as these moments provide the best lighting conditions – creating dreamy effects on cascading waters that will leave you spellbound.
Here’s a map showing top photography locations in Yosemite, including these waterfalls.
Yosemite’s allure lies not just in its grand landscapes but also its intricate details. So get ready to immerse yourself in this photographer’s paradise and make sure your camera is always at the ready.
Navigating High Altitude Views in Yosemite
For those with a taste for heights, Glacier Point and Clouds Rest offer breathtaking views. Both spots serve as the ultimate platforms to capture Half Dome from Glacier Point Road.
The Spectacle of Glacier Point
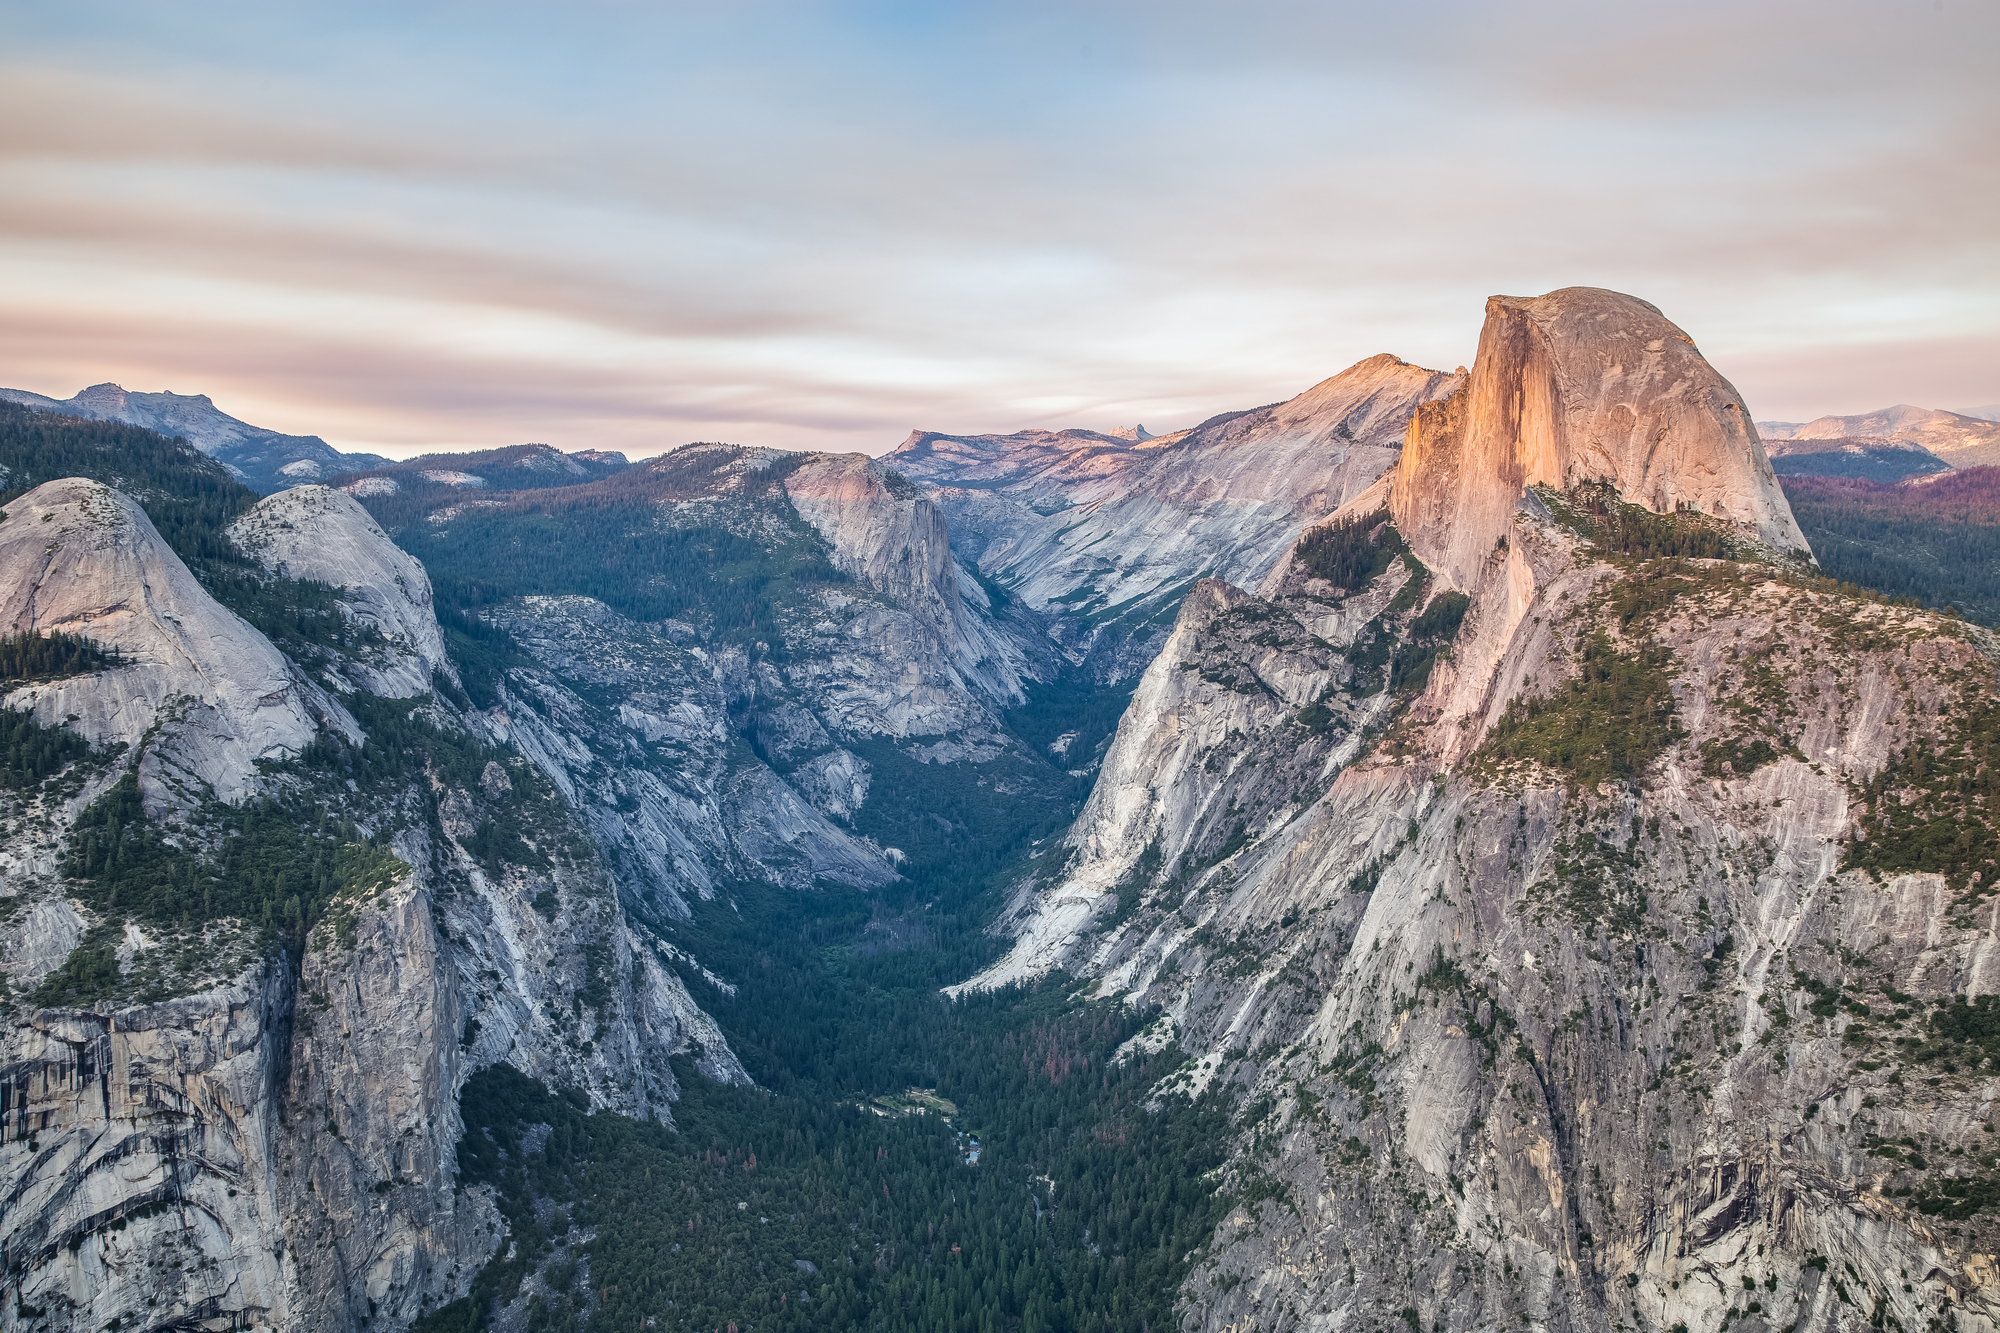
Glacier Point stands out among high-altitude photography spots. This popular lookout provides an incredible view of Half Dome and the valley below. Your snaps will make you feel alive at a height of over seven thousand feet.
If you’re seeking more adventure, then consider hiking up to Clouds Rest. While it requires a fair hike – roughly 14 miles round trip with nearly 6000 ft elevation gain – the payoff is unparalleled.
This vantage point arguably offers the best view of Yosemite National Park. From here, you can get panoramic views encompassing Tenaya Lake and even distant Nevada Falls on clear days.
No matter which location you choose between these two elevations, both will give absolutely beautiful sights especially during golden hour when soft light bathes everything in sight turning them into photographer’s paradise.
Tips for Navigating These Heights:
- Pack warm clothing – temperatures drop significantly at this altitude no matter the time of year.
- Come prepared with sturdy footwear suitable for rocky terrain if planning on venturing beyond viewing areas or parking lots to get closer shots from unique angles.
- Don’t forget water and snacks; this is especially important if heading towards Clouds Rest due to its challenging trail requiring extra energy.
Hiking for Photography in Yosemite
If you’re passionate about photography and hiking, then Yosemite National Park is your playground. Let’s talk about one hike that stands out – the journey to Eagle Peak.
The Rewarding Hike to Eagle Peak

A favorite among photographers, this trail takes you up high above the valley floor, offering unparalleled views of Half Dome Cables and Olmsted Point. The challenging climb rewards hikers with a vantage point even better than El Capitan’s summit.
To capture breathtaking shots from Eagle Peak, an early start is recommended. It allows enough time to reach the peak by golden hour when soft light paints an absolutely beautiful picture across Yosemite Valley.
You’ll need a permit for this strenuous trek but don’t let that deter you. Just check out the view on Google Maps using our link here. We promise it’s worth every step.
The elevation gain isn’t insignificant at 2200 ft but imagine standing atop with your zoom lens capturing mesmerizing photos of Half Dome Cables or Olmsted Point amidst late afternoon hues?
- Eagle Peak: A hidden gem offering unmatched views of El Capitan Meadow and beyond.
- Olmstead Point: Offering panoramic vistas over Tenaya Lake towards Clouds Rest – another stunning spot within Yosemite park boundaries.
- Half Dome Cables: An iconic sight; though getting there requires planning ahead due to permit requirements as well as physical fitness levels needed for its steep inclines.
Get ready to embark on an unforgettable journey through Yosemite National Park. Your camera will thank you.
Timing Your Visit for Optimal Photography in Yosemite
If you desire to take the most impressive photos of Yosemite, when you go is essential. But when exactly should you visit? Let’s dive into that.
The best time time for photographs in Yosemite starts in February and stretches until late April. This time frame gives photographers an opportunity to capture a range of natural phenomena unique to these months.
Visiting during this period allows photographers to use soft light conditions early morning or late afternoon, which can give your photos a magical touch. Moreover, shooting during golden hour – just after sunrise or right before sunset – brings out vibrant colors and elongated shadows, adding depth and drama to your photographs.
Vernal Fall stands as one example where timing makes all the difference. To catch the stunning rainbow at its base – yes, it’s real. – aim for mid-day shots. The sunlight hitting the mist creates this breathtaking spectacle right around noon.
Picking Your Season
In addition to specific times within each day, choosing which season you visit can greatly impact your photography experience too.
In springtime, melting snow feeds waterfalls like Bridalveil Falls and Nevada Falls creating thunderous roars heard throughout Yosemite Valley – talk about dramatic backdrops. However, if winter landscapes are more up your alley then don’t shy away from braving colder temperatures; snow-capped peaks provide stark contrasts against clear blue skies making every shot absolutely beautiful.
Crowds vs Solitude: Making Your Choice
We know that dealing with crowds isn’t everyone’s cup of tea but consider this: popular viewpoints get crowded because they offer great views.
Plan your outing with our guide to help you have it all – beautiful scenery and tranquility.
No single solution works for everyone. Every season brings its own charm and challenges. But remember, great photos aren’t just about being at the right place but also at the right time.
Practical Tips for Photographing in Yosemite
To get the best shots of Yosemite National Park, you need more than just a good camera. Preparation and timing are key to capturing the park’s majestic beauty.
- Time Your Visit for Optimal Lighting:
- Golden Hour: The hour after sunrise and the hour before sunset are known as the “golden hours” in photography. During these times, the light is soft, warm, and diffused, making it ideal for capturing the park’s iconic landscapes. These are your prime shooting times. You’ll capture not only El Capitan’s majesty but also witness how its face changes color as the sun sets. Speaking of El Capitan, head over to Sentinel Beach Picnic Area at sunset; it provides an absolutely beautiful view of this iconic granite monolith from across Merced River.
- Blue Hour: Just before sunrise and just after sunset, there’s a brief period called the “blue hour” when the sky has a deep blue hue. This is a great time to capture silhouettes of Yosemite’s granite cliffs against the sky.
- Use a Polarizing Filter:
- A polarizing filter can help reduce reflections on water surfaces and enhance the blue of the sky. This is especially useful when photographing mirror-like reflections in Yosemite’s lakes and rivers or when capturing the vastness of the sky against the granite walls.
- Scout Locations in Advance:
- Popular spots like Tunnel View, Glacier Point, and El Capitan Meadow offer iconic views, but they can be crowded. It’s a good idea to visit these locations in advance to find the best vantage points and plan your shots.
- Explore lesser-known areas of the park. Yosemite has countless hidden gems that are just as photogenic as the popular spots but without the crowds.
- Be Prepared for Changing Weather:
- Yosemite’s weather can be unpredictable, especially in the higher elevations. Always check the weather forecast before heading out and be prepared for sudden changes. A cloudy or misty day can offer dramatic lighting conditions and add mood to your photos.
- Carry protective gear for your camera equipment, such as rain covers or plastic bags, to shield it from unexpected rain or mist.
- Practice Patience and Respect for Nature:
- Wildlife can be a captivating subject in Yosemite. If you encounter animals, keep a safe distance and avoid disturbing them. Use a telephoto lens to capture close-up shots without getting too close.
- Respect the park’s rules and guidelines. Stay on designated trails, avoid trampling on vegetation, and pack out all trash. Your respect for the park ensures that its beauty is preserved for future generations and other photographers.
Packing Suggestions for Yosemite Photography Trip
Battery backup: The cold weather drains battery faster so make sure to pack extra batteries.
- Tripod: This tool comes handy especially during low-light conditions (early mornings/late evenings) where longer exposures might be required.
- Lenses: A variety of lenses ranging from ultra-wide angle to telephoto will allow you flexibility in compositions depending on what scene presents itself before your eyes. A wide-angle lens will let you cover large scenes like panoramic Valley View or vast meadows such as Tuolumne Meadows while telephoto zoom lenses can help with detail-oriented captures like climbers on ‘El Cap’ or distant peaks seen from Glacier Point Road. Choosing the right lens is essential.
With these tips in mind, there’s no doubt that all 15 recommended photography spots throughout Yosemite would yield stunning photos ready for display.
FAQs
What is the most photographed place in Yosemite?
Tunnel View, hands down. It offers a sweeping panorama of El Capitan, Half Dome and Bridalveil Fall – classic Yosemite.
How do you take good pictures in Yosemite?
Arrive early for soft light, pack a tripod for long exposures, and play with composition. Research spots beforehand to save time.
Do you need a permit to photograph in Yosemite?
Nope, unless it’s commercial photography or involves props/models. For personal use? Just click away.
Where is the best place to take a picture of Half Dome?
You can’t beat Glacier Point for an epic shot of Half Dome – it’s just stunning from that vantage point.